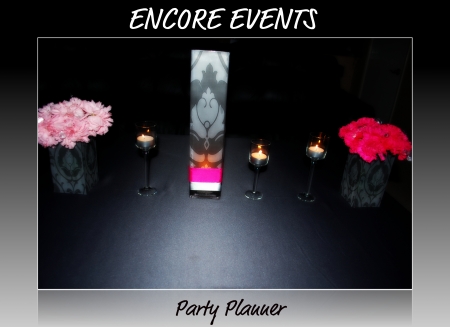
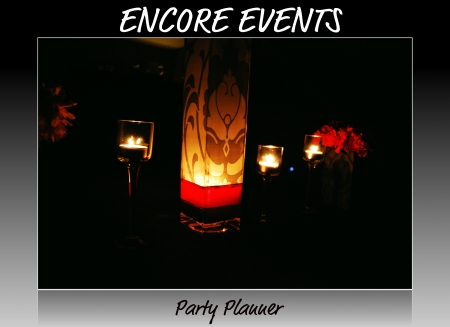
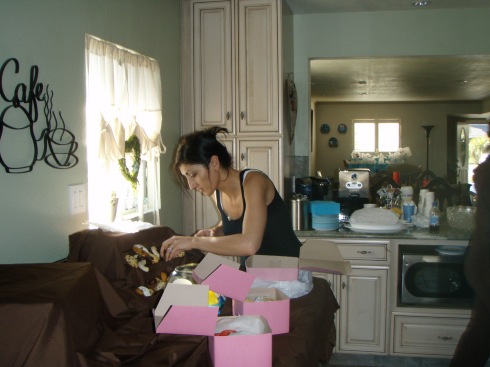
I love, love, love the vases this party planner from Encore Events designed for a gorgeous graduation party. Check out the Encore Events blog to see more.
Divine Ducky Baby Shower
26 AugHostess With the Mostess has some of the cutest baby shower decor ideas on the web. I first ran across the site looking for ideas for a baby shower when I spotted this great Bubbly Ducky Baby Shower spread.
Considering that we had over 40 guests, I couldn’t quite set up the tables in such a beautiful way without shelling out some serious cash. So here’s my take on a more bugdet friendly version for a large number of guests.
Event: Baby Shower
Guests: 45
Budget: $253 ($165 without gift bags)
Discount fabric stores and wholesale florists that are open to the public are two of my favorite places to browse for inspiration and fantastic deals. I found some great brown fabric for $1 per yard so I bought 15 yds (just in case) and used them as table covers, for the dessert bar and other miscellaneous table tops. I also bought some pretty bright blue disposable table covers, paper plates and cups ($40 total) to break up the brown a bit.
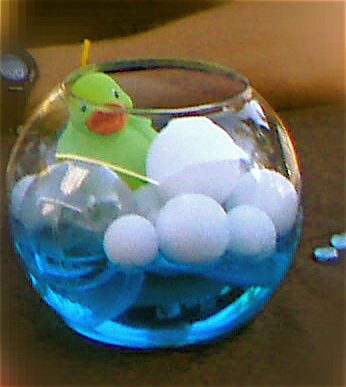
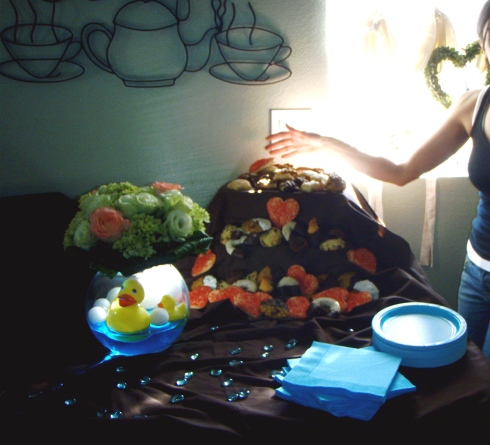
For the centerpieces, I tweaked the Hostess’ design a bit and came up with this:
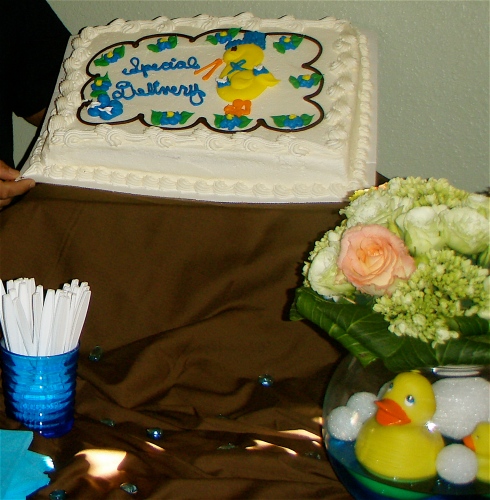
It’s not the best picture, but you get the idea. Four of these were sufficient for the tables and they were really easy and fun to make. Since I already had the bubbleball glass bowl vases (well, I only had one, but I borrowed some from family) they were really inexpensive. The bowls are pretty cheap though, around $5 or so. Save-on-Crafts has them starting at $2.99 for the 4 3/4″ vases.
Packets of Styrofoam balls, if I remember right, in 1″, 1 1/2″ and 2″ sizes were about $10 total. The Styrofoam balls come in packets so there were some left over for future projects too 🙂 The clear balls, which I just found out are really called clear fillable ornament balls , came in two pieces. (For another party, I filled them with small flowers and hung them from a tree.) Michael’s had them at $1 a piece for the 2″ and 3″ sizes, so I bought 12.
The rubber duckies in, various sizes and colors (pink, purple, blue, yellow, and green), came in a packet of 12 from K-Mart for $10 a bag. Two of those were plenty.
We mixed the water and food coloring in a pitcher, to make sure all the centerpieces had the same coloring, added a little water to each bowl, dropped in the balls and topped it all off with a ducky.
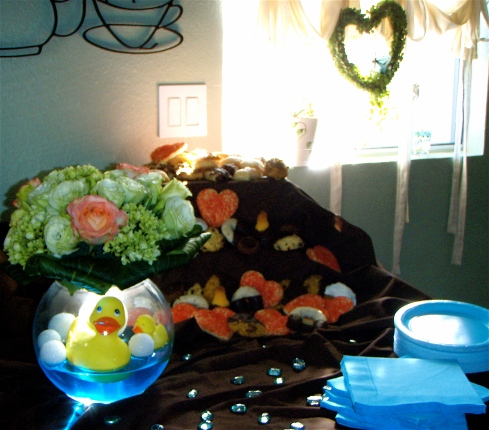
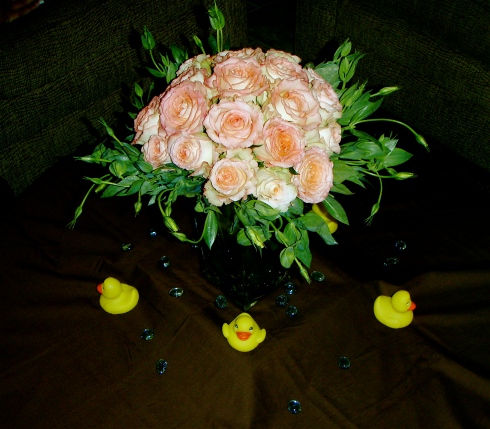
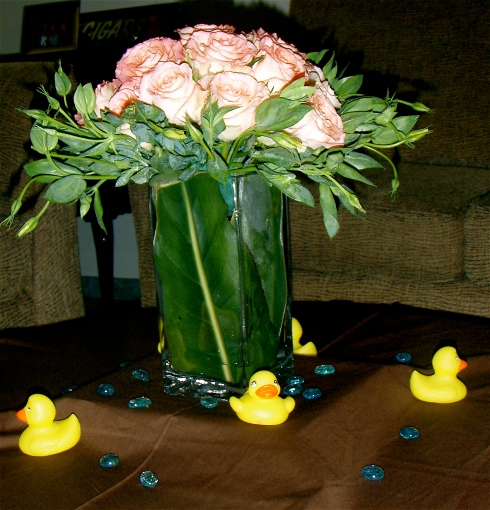
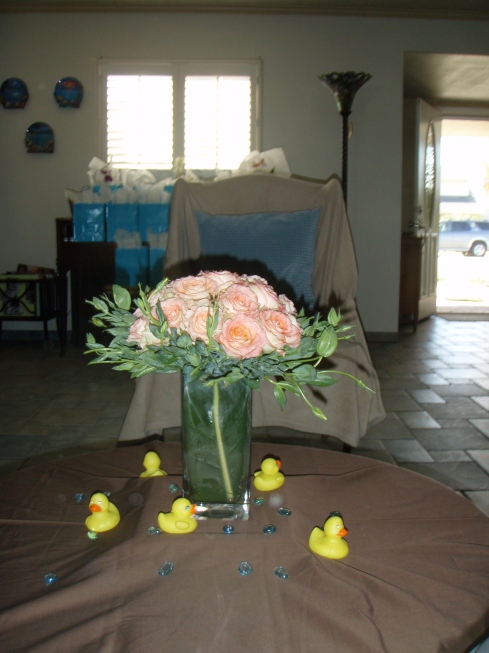
I think the floral centerpieces came out great and here’s where the good florist comes in handy. We asked ours what was in season and well priced. She suggested ranunculas, aka Persian Buttercups. She also told us that white stock flowers were also always a good choice and that she had an overstock of pink roses. The total for 2 dozen pink roses, 6 stems of ranunculus and one batch of white stock was around $33. For this version, I bought Wet Oasis floral foam ( 4 bricks for $5), prepped the foam and stuck in the flowers. To conceal the edges I got some leaves from a neighbor’s yard, bent them in half and attached them to the foam with toothpicks and green floral wire, voila!
For the second centerpiece, I lined the sides of the vase with the leaves, filled it with water and some foam to keep the leaves in place and then arranged the flowers. The unopened ranunculus looked great as a kind of frame around the flowers.
Four packets of ice blue vase gems ($1.20 for a packet of 24) scattered around different tabletops gave them a little extra oomph.
Since it was more of a bring the whole family co-ed baby shower, some blue gift bags filled with goodies from the dollar store for the kids kept them occupied and happy…for about 10 minutes anyway 😉 For the adults, we used the same bags but filled them with adult goodies, like an orchid from Costco or a travel set from Bath and Body Works. You can kind of see them in the background of this picture.
Total cost for 8 kid’s gift bag $4o and 4 adult gift bags $48. (We splurged a little here, but who really needs another vanilla scented candle or Dollar Store fake gold frame! That’s actually one of my pet peeves about party favors. They don’t have to be extravagant or anything but sometimes it just feels like people get things for the sake of getting them and end up wasting money on something the guest will eventually throw out. My rule of thumb, NO TRINKETS! Unless it’s a destination wedding and you’re giving guests more of a souvenir. That’s why I love plants, edibles, travel size soaps or lotions instead. Actually, I just realized a small pot of basil of lavender would be a really great idea for a gift bag! I’m off my soap box now.)
Well, thanks for visiting! Let me know if you have any ideas you’d like to share or try out.
Tags: baby shower, budget friendly, centerpieces, decorating ideas, diy, ducky, Events, gift bags, party decor, party planning, rubber ducky, special events
- Comments Leave a Comment
- Categories baby shower, Events
Gorgeous Paper Flower Garland
25 AugI just ran across this site, The New New Blog, which features a really beautiful paper flower garland idea that’s super easy and inexpensive. My wheels are turning for the next party…
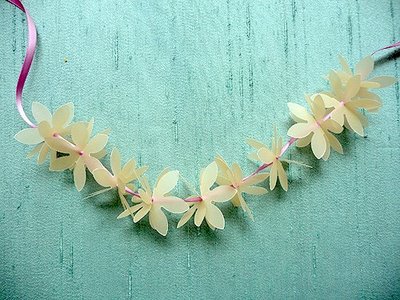
Paper Flower Garland from the New New Blog
You could also tie a knot at the end of the ribbon and hang a ton of them from the ceiling for a really dramatic buffet, dessert bar or drink station.
Tags: decorating ideas, Events, paper flower, party decor, party planning
- Comments Leave a Comment
- Categories Eye Candy
Swanky Seventy-Fifth Birthday Bash
25 AugAll of my grandparents passed away before I was old enough to really get to know them. When I met my hubby though, his Numa (well really his whole family) kindly accepted me into the folds of her family. I could ramble on and on about the plethora of inspiring, adventurous and hilarious memories she’s shared with me about her amazing life growing up in Chicago, raising her family in California and the glory days of glamorous Las Vegas and Palm Springs, but that would need its own blog! So instead, I’ll settle with sharing the details of her 75th birthday party.
Numa’s not exactly a “me, me” type of person, she’s the kind of woman who had spent the majority of her life silently and happily working in the background to ensure that her family had the best of everything life has to offer and if you ever meet any of her kids, you’ll see what a great job she did.
Getting her to divulge what she wanted for her big birthday was no easy feat and after nearly three weeks of pestering her, she finally told us that the only thing she wanted was to have a nice dinner with all of her family and a family portrait to frame on her wall.
After searching high and low for a venue to have the dinner at, we finally decided that the best thing would be to have a surprise party for her at her daughter’s house (the same home my previous bridal shower post was hosted in). Since her furniture was brown and beige, we stuck to that as our main color scheme, adding some red for pop and dark brown, blue and green as accent colors.
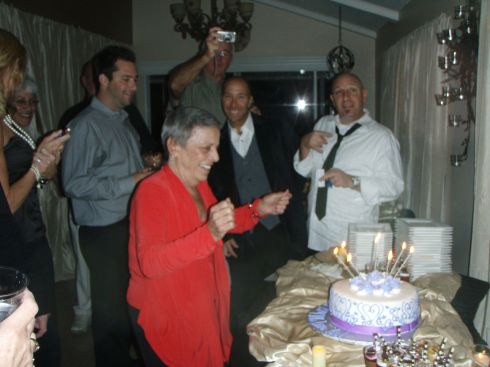
The idea was to have a lounge style setting with plenty of room to dance and play games (she’s an avid card player). Everyone was asked to dress in black or white and the guest of honor was cajoled into wearing red, which made the family portrait stunning! But first, here are some pictures of a very surprised Numa entering the party:
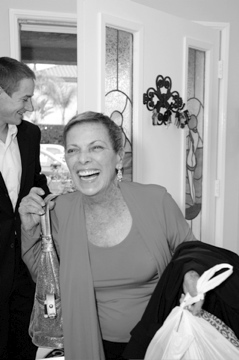
SURPRISE!
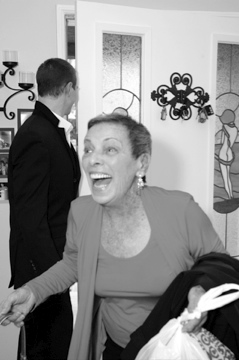
Courtesy of Tamsen Photography
I started out by scouring her albums and scanning in pictures of her and the family. Everyone also contributed by sending in their favorite pictures of her. All the pictures were converted to black and white and I bought pre-cut card stock in red, beige, blue and green to frame them all. I layered the different sized cardstock to create dimension as well, using DOTS to attach the pictures. Then I created a wave pattern around the entire room and provided little flashlight so everyone could see the pictures since we wanted a candle-lit effect to create a loungy mood. At the end of the night, the guests could take their favorite pictures off of the wall as a parting gift.
We hired Tamsen Photography , a very reasonable and friendly photographer, to take the family portrait and you can see her beautiful pictures throughout this post.
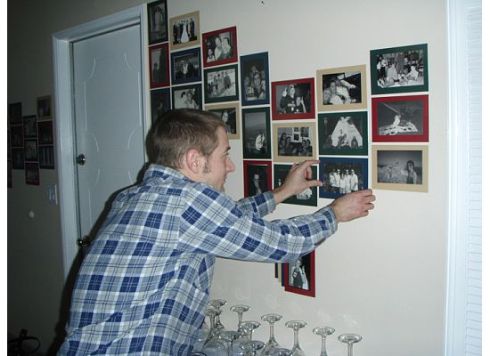
My hubby helping set up the pattern
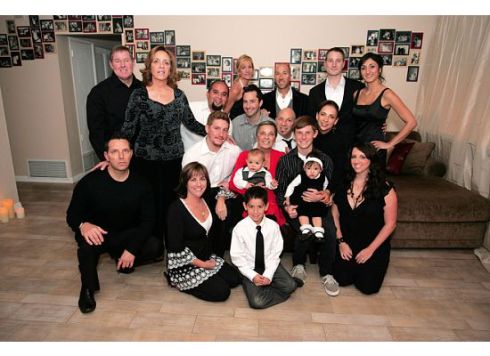
Family Photo with the Picture Wall courtesy of Tamsen Photography
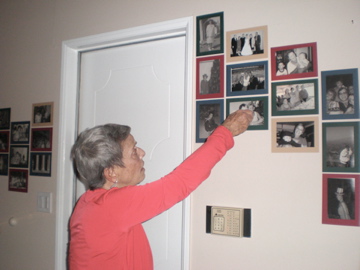
Numa checking out the pictures with a small flashlight
The best part about this project was that all the photos were now digitized and uploaded to Shutterfly. I love the Shutterfly share site, which gives you the ability to create your own event website. This gave everyone access to the treasured scanned photos, Tamsen’s professional shots and each guest the ability to upload their own pics from the night. You can also download pictures onto your computer without having to order a CD (I’m looking at you Costco) which is VERY nice. It’s a one stop picture shop, lol.
To make the house feel, well, less like a house and more like a “venue”, we hung silk beige floor length drapes over all the windows and to conceal the open floor plan kitchen. We bought shower curtain rods, attached them to the wall with 3M Removable Hooks and hung the drapes on them. We also bought tons of beige, brown and red pillows to place all over the furniture and around the room.
The kitchen is to the left
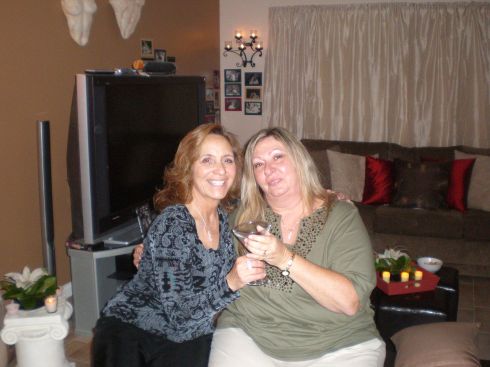
My MIL on the left with our photographer Tamsen Arabi of Tamsen Photography
We ordered our flowers from Visser’s, a phenomenal florist (they also did my wedding flowers) who helped us come up with these designs based on one of Numa’s favorite flowers, stargazer lilies. We ordered one large and about 8 small arrangements to place around the room.
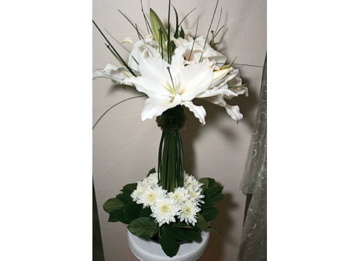
Large Arrangement by Visser's, Picture by Tamsen Photography
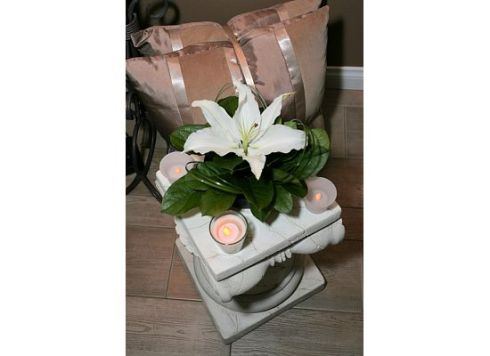
Small Arrangement by Visser's, Picture by Tamsen Photography
We also ordered some additional bear grass and lilies for the fireplace and glass shelves and hydrangeas for the sconces.
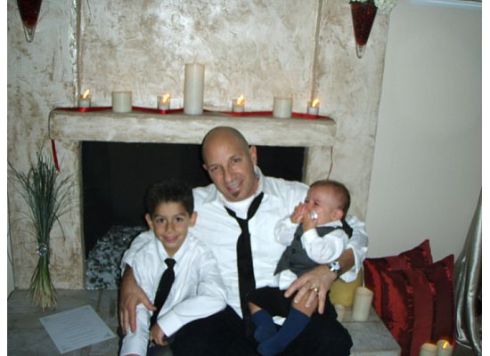
Bear grass gathered with a napkin holder and proud grandpa with his boys
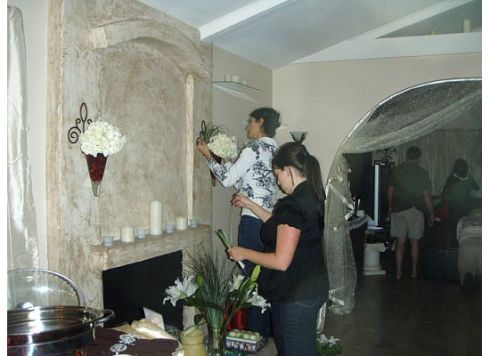
Setting up the hydrangeas in sconces filled with cranberries the night before
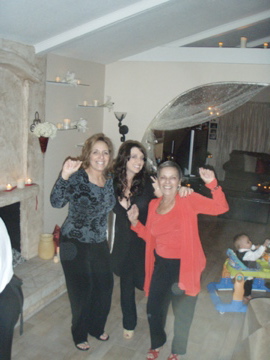
Since the event had to be kid friendly, we used battery lit candles everywhere, including above the archway in the above pic. It’s hard to tell from the pictures but all the candles (nearly 50 total) gave the room a really soothing and warm vibe, and more importantly, we didn’t have to worry about the kids, me or an accidental fire (you’d be amazed at how clumsy I am).
I found these gorgeous napkin rings at Target and, after visiting 5 stores, we found enough for all the tableware.
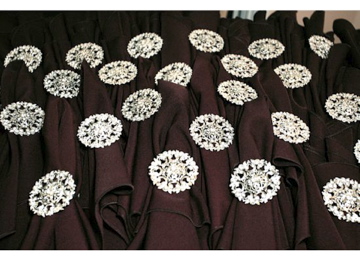
Napkin Rings from Target, Napkins from Jay's Catering, Photo by Tamsen
The napkins turned out to be a focal point on the buffet, which we created with serpentine tables. Jay’s Catering, one of the BEST caterers around provided all the food, desserts (except for the cake and fruit basket), and table/dishware.
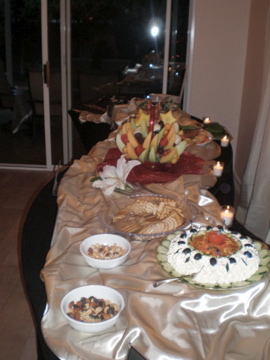
Table Setup
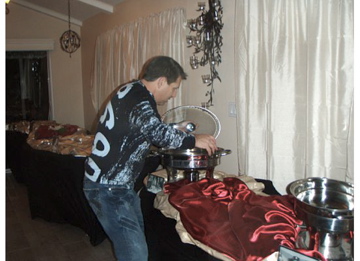
Pre-settup the night before
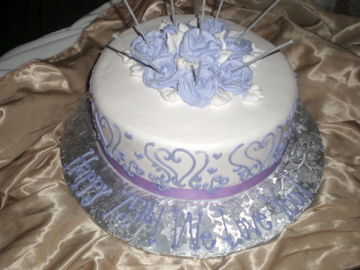
Cake in her favorite color, Picture by Tamsen
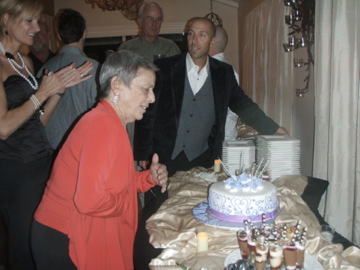
You can see the tiny dessert shooters from Jay's Catering at the bottom right of the picture. Three words...To Die For!
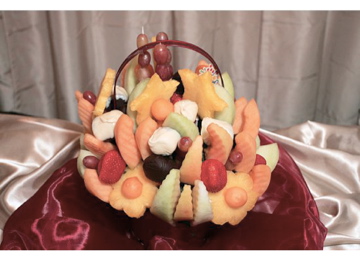
Fruit basket at the center of the buffet, photo by Tamsen
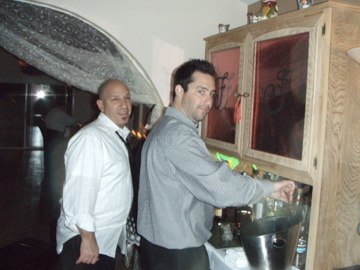
We converted a large cabinet into a bar and my hubby cut out Numa’s initials from black construction paper and taped them to red wrapping paper to conceal the contents of the cabinet. Then we stuck these cool press lights that stick to nearly any surface on the underside of the cabinet to give the bar a nice glow.
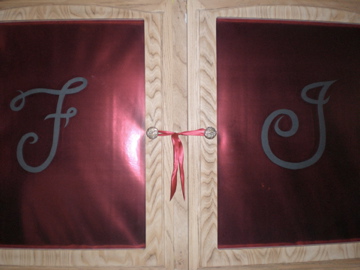
Initials on the bar
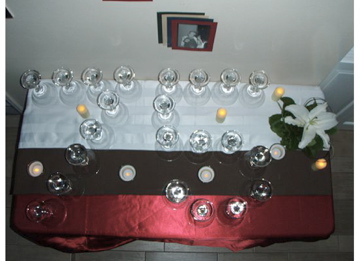
My absolute favorite aspect, though, was the signature drink bar in the entry. I arranged the cups to look like the number 75 and dropped a cranberry in each glass. The signature drink was White Cosmopolitan Martinis, which were simply delicious!
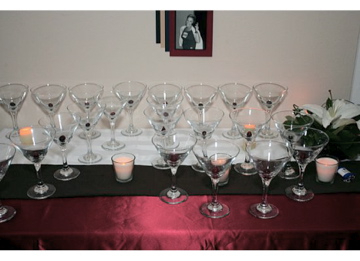 Here’s the recipe for the drinks courtesy of Martha Stewart, the only substitute we made was to use White CranRaspberry Juice:
And finally, here are some pictures of us playing Left, Right and Center, a really fun and inexpensive game that can be found at Amazon in the link above or at Party City.
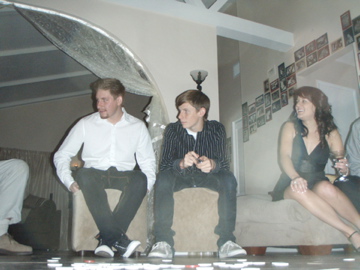
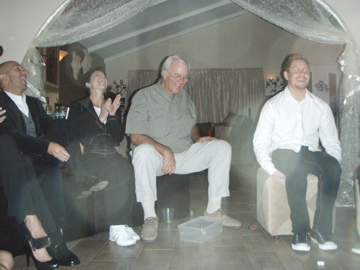
Thanks so much for visiting my blog, please feel free to leave any comments, suggestions, etc…until next time!
Tags: birthday, centerpieces, decorating ideas, diy, Events, games, party decor, party planning, special events
- Comments Leave a Comment
- Categories Birthday, Events
Eye Candy
25 AugRan across this great site, Creative Parties and Showers that features really great and inspiring parties from various blogs and sites. Loved the “Project Runway” birthday party and the “Pirate” Birthday theme too! I’d keep writing but I’m going back to see more, lol! ❤
- Comments Leave a Comment
- Categories Eye Candy
Father’s Day Festivities
24 AugMother’s Day seems to dominate the parent holiday scene, in terms of event decoration, and I thought it was about time to give our dads a little more attention (even if they care more about the food than the flowers, lol.) So here’s another inexpensive event designed for dads.
Event: Father’s Day
Budget: $140
Guests: 11
This all started with this fun table setting I’ve been wanting to do for years. Unfortunately, it requires a short guest list and LOTS of space. My parent’s backyard gave me just the perfect opportunity to try it out.
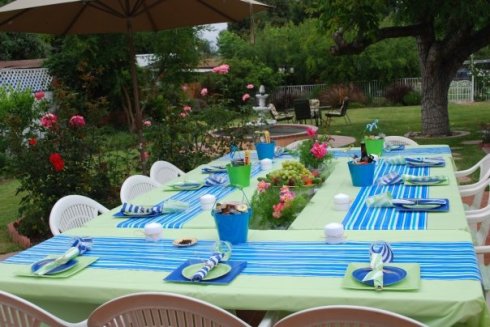
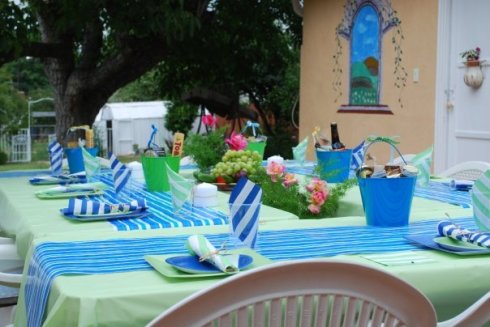
I wanted the decor to have a masculine but whimsical feel to it and when I found these paper plates and napkins at Target (approximately $40 total for tableware), I thought it would come together really well in my parent’s backyard. I set up the tables in the rectangular formation and then put three pillars in the middle. My mom cut flowers from her garden and made two arrangements to flank the fruit tray we put on the middle pillar.
I bought disposable green table covers and wrapping paper from Target (four table covers at $3 each and two rolls of wrap for $2 each.) I used the wrapping paper as runners, taping them to the table cover to keep them in place. I rolled the utensils in the napkins and a last minute decision to tie them with raffia fit well into the outdoor setting. I also wrapped some raffia around candles and alternated those with the gift buckets. Because of the wind I had to lay down the cups and attach weights to the table cover, but here’s how it looked just before they arrived:
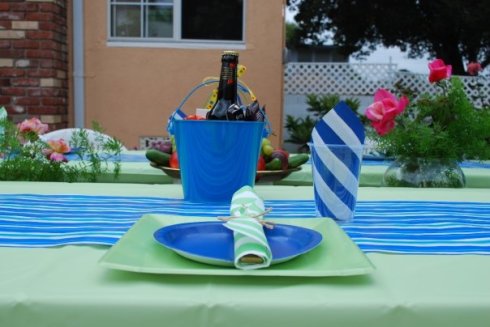
For each dad, I designed a bucket of gifts based on their interests. I bought the ribbon and bucket at Target in the clearance section ($2 per bucket and $1 for the ribbon). I found most of the goodies atCost Plus World Market where they have tiny sample sized wines, cheese, crackers, chocolate and whole mess of other goodies and spent around $12, give or take, for each. Here’s the bucket for my FIL, who loves chocolate and beer:
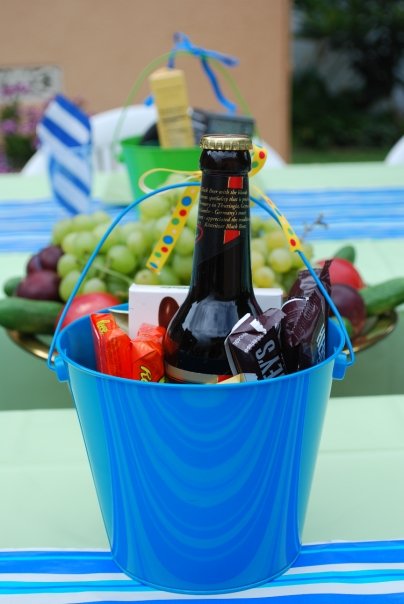
If I’d had a little more time, I would’ve made a band with their initials around each bucket.
We also found some inexpensive instruments at Cost Plus World Market. My MIL bought those, at around $5 each, and we wrapped them with the leftover wrapping paper. We asked each dad to pick one at random and none of us thought they’d get that into it, but it turned out to be really funny:
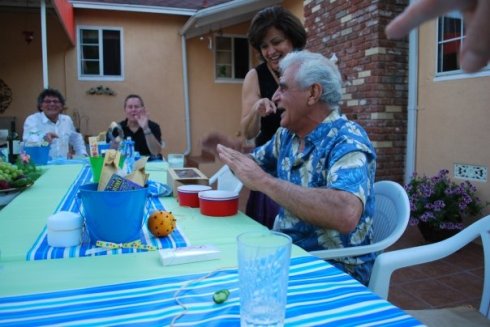
My dad playing the bongos
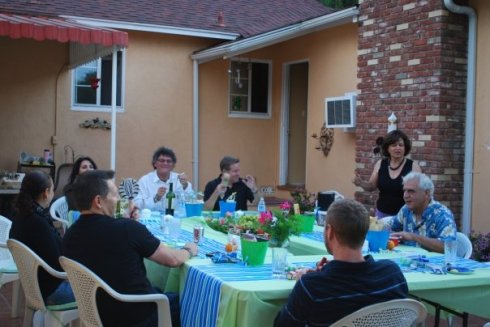
All the dads playing their instruments
I almost forgot, a great way to keep the flies away without the icky citronella candles smell is to press cloves into oranges. They seemed to work and were a fun addition to the table.
A really great hostess once told me that one of the best ways to ensure a hit party is to incorporate some kind of activity, so we rounded off the night with a Bocce ball tournament:
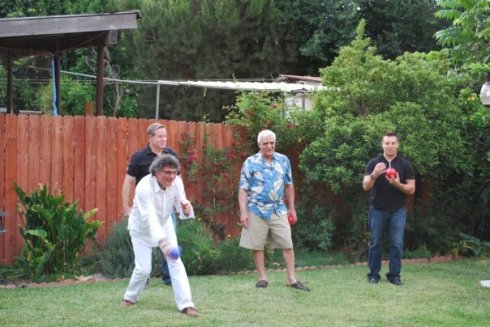
The girls played a little later and, wow, we are way more competitive than the guys, lol.
I forgot to take pictures of these yummy desserts we served, but here’s a quick and easy recipe for some really presentable stuffed mini phyllo shells from Athens Foods. I made the Cranberry Lemon Mini Baklava Tarts and something similar to the Warm Mini Apple Pies, using pears instead :
Overall, I think my dad enjoyed himself 🙂

Up next: Fiesty 75th B-Day Party…
Tags: bbq, budget friendly, centerpieces, decorating ideas, diy, Events, father's day, gift bags, party decor, party planning, special events
- Comments Leave a Comment
- Categories father's day
Budget Bridal Shower
23 Aug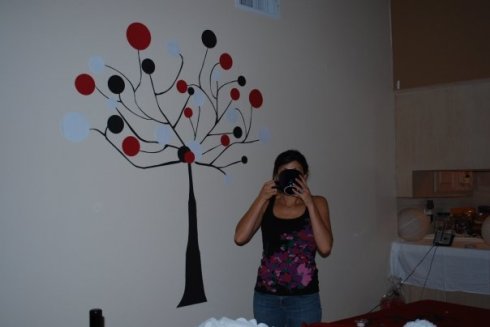
Coffee and crafts, my two addictions...
My first blog! I recently had the very fun honor of decorating a bridal shower for the most amazing cousin-in-law/friend a girl could ask for. I love decorating for events and do so every chance I get, regardless of whether I have to beg, borrow, but not quite steal (do leaves from a neighbor’s garden count?) to get it all done. There have been so many amazing blogs and sites that I’ve drawn inspiration from that I really wanted to share my take on a modern and romantic bridal shower on a budget. I hope you enjoy it!
Event: Bridal Shower
Budget: $195
Guests: 38
I usually start with an inspiration board (or nine) to get the creative juices flowing. I wanted the shower to really reflect the bride, who is a perfect mix of girly and fun. I imagined that she would love something very pink and black, with feathers and lots of glamorous details. So I created some inspiration boards and sent them out to the other bridesmaids to get some feedback. Unfortunately I already deleted them but I’ll try to post some others in future blogs.
One of the girls was really partial to a “cherry” theme board that I made and after looking at her bridal registry I realized that her decorating style seemed to have a much more modern and sleek sensibility. (I’d never even thought of referring to her registry to get ideas for the décor!) So here’s the really quick board I did for that one:
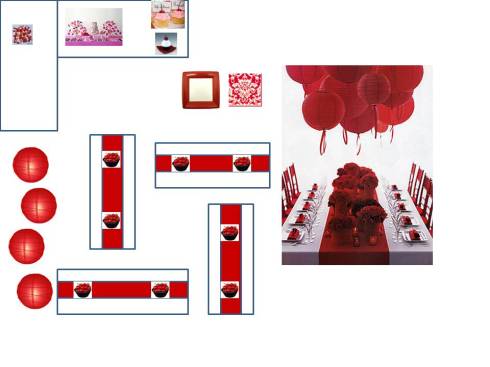 I really loved the table setting and wanted to figure out how to emulate it a little more economically. The red chiavari chairs, which I love, would have eaten up the entire budget and were not easy to track down. So instead I focused on how I could get crafty and have a similar effect.
I happened to run across this gorgeous Chanel paper flower runway decor, which made me really want to do something with paper flowers.
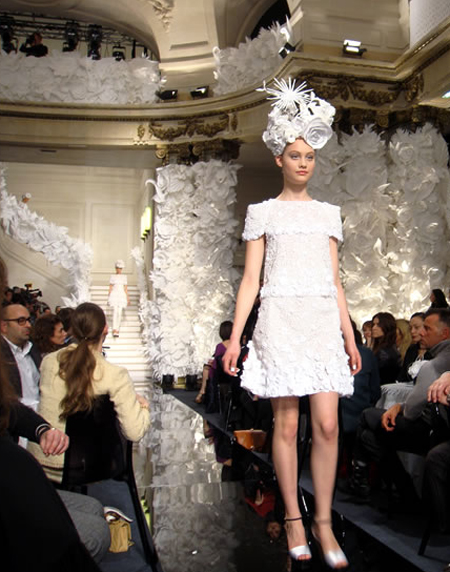
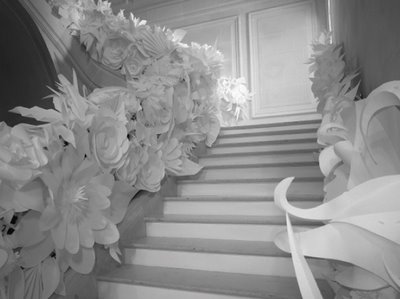
I wish I had had the time and talent to do these, but I settled on something a little easier:
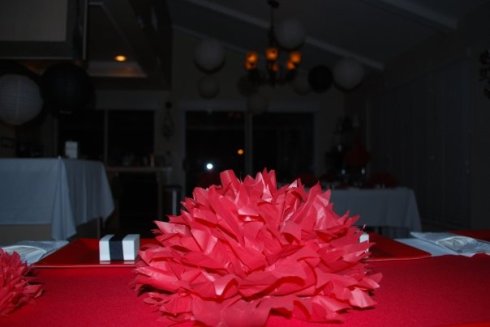
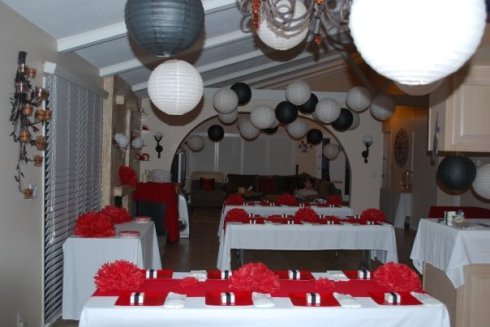
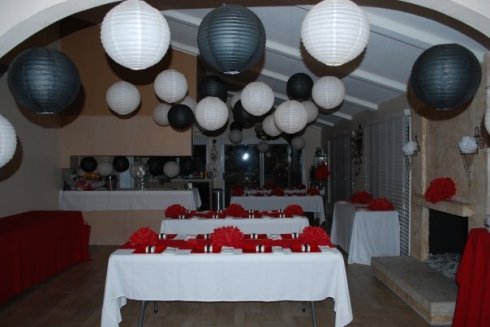
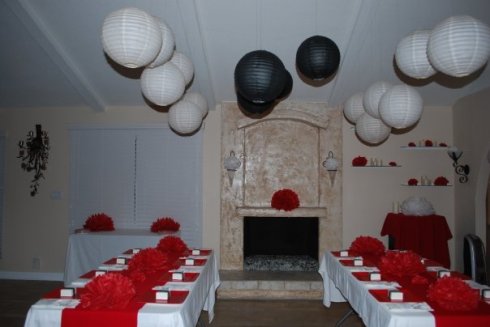
Even though I’d originally wanted to use various vases with red fabric wrapped around them, I thought these looked fun and unique, and they fit the look of my inspiration table setting. They’re surprisingly easy to make and very inexpensive, around $2.50 for a pack of red tissue paper, I bought 4 and still have some left over. I also had a bunch of white tissue paper so those were free 🙂 Here’s a quick link on how to make them:
http://www.howcast.com/videos/288-How-To-Make-Tissue-Paper-Flowers
I used paper clips, and when I ran out twist ties, instead of the pipe cleaners. I also experimented with different cuts instead of the v-shape and I think it’s easier to cut once folded.
I made three large and three small flowers for each table and extras to place around the room and on the food and drink tables.
For the runners, I bought red fabric from a local discount fabric store on sale for $2 per yard. (We ended up buying around 16 yds, so around $32 total) I measured and cut the fabric and used fabric glue and an iron to clean up the seams.
The paper plates were from Target, (around $35 total, including napkins)and I bought the favor boxes from Michael’s in a diy kit from the Brides collection for $20. We stuffed these with tissue paper and Ferraro Rocher chocolates totaling $40. (Damn those things are yummy!)
We used paper napkins and folded them like this:
http://www.youtube.com/watch?v=oHkbOV_OeOo
Then I created a monogram and designs for a simple napkin holder and printed them on heavy weight paper for a customized feel.
Here’s how it came together:
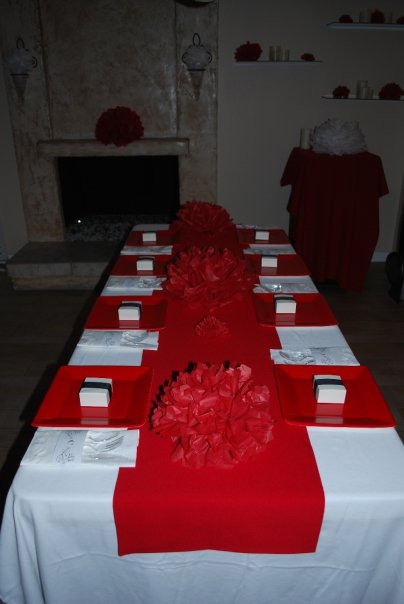
I ended up putting the napkins on the plate and placing the favors on the table though and you can kind of see the napkin rings on the bottom left hand side of the picture.
To fill up a large empty wall I created a “tree” using construction paper I bought in packets of red, black and white for $3.75 a packet. Using a circle cutter I cut 2″, 3″ and 5″ circles and free-hand cut the trunk and branches as I went along. Th only thing I wish I’d done differently was to use double sided tape instead of just taping over everything, but it was late and by the time I realized it was going to work (I originally intended to test drive it first) I was too tired to redo the whole thing. Here’s how that came out:
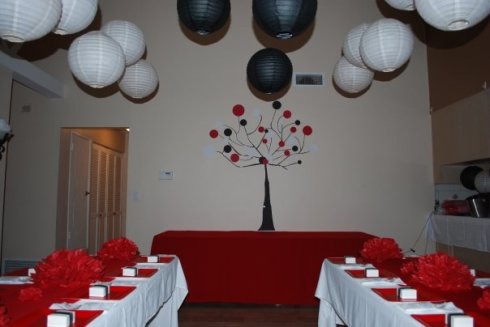
We also seriously scored on the paper lanterns as a friend had some left over from her wedding and we used those, hanging I think somewhere around 40 overall. (Thank you my wonderful hubby for hanging most of those and my awesome MIL for helping so much and putting up with my craziness, lol!)
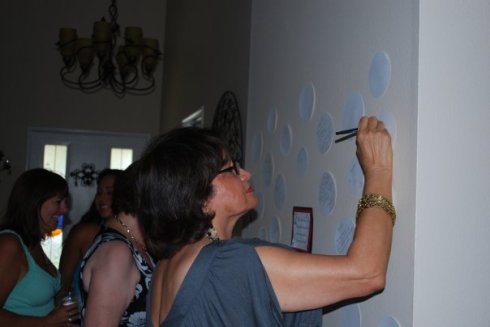
I was loving the little circles, so in the middle of another wall by the entry I wrote:
Now that we’re
all gathered inside
share some words
of advice for the bride
I taped white circles all around it, making sure not to go too high. It was really fun (and a little tear jerking) to read what everyone wrote. Here’s my mom giving her advice:
I also made another sign for the front that read:
She’s all grown up
but still giggling with glee
come in and celebrate
the sweetest bride to be…
Both of those were inspired from the wording in her invitations (I’ll try to post pictures later).
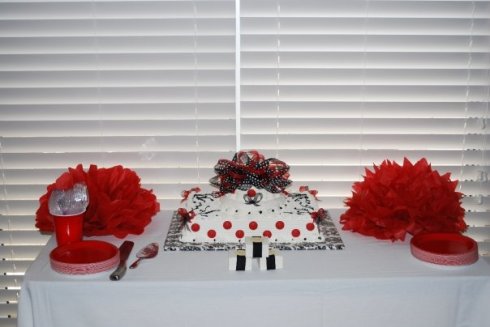
The bride’s aunt also made this fun cake for her and let me tell ya, it tasted as good as it looked!
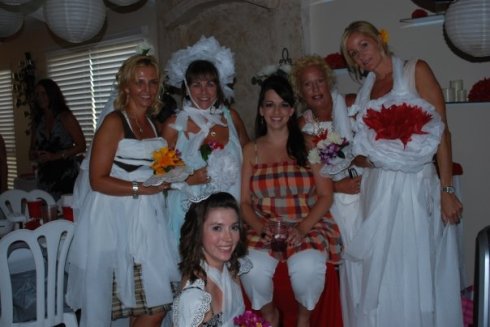
The Beautiful Bride-to-be and her TP court
The paper flowers ended up doubling as decorations in one of the games we played too 🙂
Oh, I almost forgot the signature drink (and the only place the original cherry idea was actually incorporated), cherry limeaid margaritas. We almost ran out, and considering how much we made, I think they were a hit.
Scaled down recipe for cherry limeade margaritas:
1 1/2 pounds of frozen unsweetened cherries, thawed and drained.
1 cup fresh lime juice
1/2 cup sugar
3 cups water
5 oz tequila
2.5 oz triple sec
In a blender, combine cherries, lime juice, and sugar; whirl until smooth. Press through a fine strainer into a pitcher extracting as much liquid as possible; discard residue. Stir in 3 cups cold water, tequila and triple sec and serve over ice.
We bought red roses in bulk at Costco for $24. We put those in front of the fireplace and in the sconces above the mantle. We also got a mixed bouquet there for $12 and used it near the entry. I used some of the flowers from the mix in the bathroom too. The bride’s awesome brother and his amazing girlfriend hooked us up with free chairs and tables too!
Here are some more random pictures:
I think that about covers it. Thanks so much for bearing with me through my first post! Up next: A Father’s Day BBQ celebration…
Tags: bridal shower, budget friendly, centerpieces, decorating ideas, diy, Events, paper flower, party decor, party planning, special events
- Comments 1 Comment
- Categories baby shower, bridal shower
